Showing posts with label Pastry. Show all posts

Saturday, 17 October 2009

Happy Deepavali 2009

This year is a special Deepavali to me as I get to celebrate it for the first time in my own place after marriage. Though busy at work, I still managed to make some festive delicacies.

Clockwise from top: Ghee Balls, Achi Muruku, Pineapple Jam Tarts & Muruku
Centre from left to right: Blackforest Cookies, Orange Cookies & Custard Cookies


Wishing Hindus Thoughout The Globe a Very Happy & Prosperous Deepavali

Sunday, 4 October 2009

The Rocky Pastry

Rock bun is a specific type of pastry, distinguished by the hard, crust-like texture and sweet taste. This spicy British pastry usually also has a sugar-crust topping and is full of coarsely chopped dried fruit. Rock bun is also called rock cake as it is a cross between a cookie and a small cake. It is made using the rubbing in method. This method achieves a dry and open texture. Rock bun is baked in small mounds, which take on a rocklike appearance.

I made my very first batch of rock buns at school when I was 14 years old. Ever since then, I fell in love with the rocky pastry. Similarly, my sister and children too love them.

Rock Buns

What do we need:

2 cups flour
4 tsp baking powder
1/3 cup cold butter
1/2 cup sugar
1 cup mixed dried fruits
1/2 tsp ginger powder
1/2 tsp cinnamon powder
1/4 tsp clove powder
1 cold egg
1/4 cup cold milk


How do we do it:

In a food processor, place the flour, baking powder and cold butter. At a low speed, mix the ingredients until it resembles coarse breadcrumbs. Mix in sugar, the spices and the dried fruits with a metal spoon.

Slightly beat the cold milk and egg together. Gradually pour the egg mixture into the flour mixture. Gently stir just until the dough binds together. Drop the dough by teaspoonful on a greased or lined baking sheet. Bake at 200° C for 10-15 minutes or until golden brown. Remove and cool on wire rack.


Enjoy Rock Bun with a cup of tea.


Sunday, 20 August 2006

Weekend Baking Session # 25

Weekend Baking Session this week celebrates its 25th round with an Improved Indian Dessert.

Carrot Halva Tartlets

What do we need:

Almond Pastry
3/4 cup plain flour
1/4 cup ground almond
1/4 cup cold butter
1/4 tsp salt
ice water, as needed

Carrot Halva
2 cups carrots, grated finely
1 1/2 cups milk
1/2 cup sugar
1 tbsp ghee
4 cardamoms, powdered
a pinch of saffron strands

slivered almonds for garnishing

How do we do it:

Combine flour, salt and ground almond. Grate cold butter into the mixture. Rub lightly with fingertips until the mixture resembles coarse breadcrumbs. Gradually, add the ice cold water 1 tablespoon at a time just until the dough binds together. Make sure not to over work the dough. Wrap with cling film and refrigerate for 2 hours.

Heat ghee and fry the grated carrots slightly. Pour milk and sprinkle the saffron strands. Let it boil. Cook the carrot to soft paste stage. Now, add the sugar and continue cooking while stirring. Remove from heat when the halwa looks gooey.

Divide the pastry dough into 8 portions. Press each portion evenly into greased tart mould. Trim edges to remove excess pastry. Prick base of each tart with a fork. Cover and chill again for about 15 minutes. Then, blind bake the pasty cases in a preheated oven at 200º C for 15 minutes. Remove from oven and place the tartlets on a wire rack to cool.

To assemble, fill the tartlets with cool carrot halva. Top with slivered almonds.


Sunday, 2 July 2006

Weekend Baking Session # 19

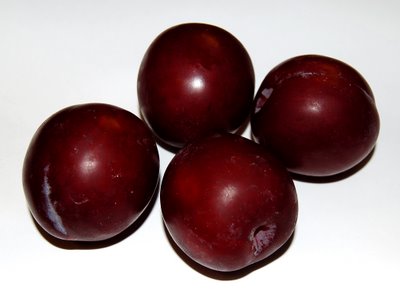
Plums are member of the stone fruits family that arrives in the summer. Plums grow in clusters, are plump, have very smooth and shiny skin and a centre pit. Plums can range in shape from oval to round and in size from 1 to 3 inches in diameter with a depression at the top where the stem attached. Their colour can be yellow, white, green, red, purple, indigo blue and almost anything in between with equally varying skin colour. The pale silvery-gray, filmy-looking coating on a plum's skin is natural. Some plums are much firmer-fleshed than others. Plums contain vitamin A and potassium.


Plums


Plums are sweet, juicy and edible. There are many varieties, some sweet, some acidic, and some best suited for drying into prunes. They are often enjoyed fresh for out-of-hand eating, but they work well in cobblers, compotes, tarts, jam and chutneys. They are also available as canned plums, packed in either water or sugar syrup. Plum juice can be fermented into plum wine. When distilled, this produces a brandy known in Eastern Europe as Slivovitz.

Yoghurt Plum Pie

What do we need:

Pie Crust
2 cups flour
1/2 cup cold butter
1/4 cup ice cold water
1/2 tsp salt

Filling
2/3 cup yoghurt
1/3 cup sugar
2 eggs
500 g ripe plums

How do we do it:

In a food processor, place the flour, salt and cold butter. At a low speed, mix the ingredients until it resembles coarse breadcrumbs. Gradually, add the ice cold water 1 tablespoon at a time just until the dough binds together. Make sure not to over work the dough. Wrap with cling film and refrigerate for 2 hours.

On a floured board, roll out the dough into a disk, 2 or 3 inches larger than the pie pan. Transfer the pastry onto the pan. Fit the pastry very well on the bottom and side of the pan. Cut excess pastry. Line with a sheet of aluminium foil and place dried beans or rice as weights. The purpose is to prevent the pastry from bulging out when baking. This method of baking is called blind baking. Bake in a preheated oven at 230°C for 10-15 minutes. Remove from oven. Then, lift the aluminium foil together with the weight. Now return the pastry shell to the oven and bake for another 5 more minutes. Remove from oven and set aside.

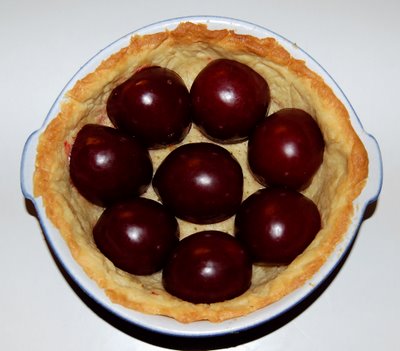
Half the plums and remove the stone. Arrange in a circular form inside the pie shell.


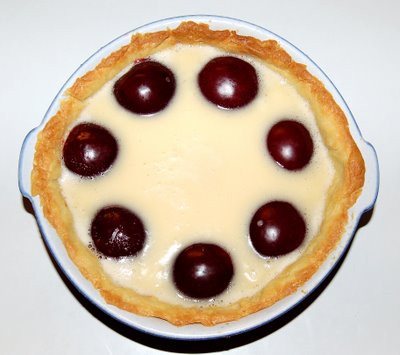
Combine yoghurt, sugar and the eggs. Beat well. Pour the mixture onto the plums.


Bake at 150° C for 30 minutes or until a skewer inserted comes out clean.


Sunday, 11 June 2006

Weekend Baking Session # 16

Today I had some guests for high tea. I made an array of goodies. One of them is something that I had wanted to make for a long time. Finally, found the right time. Here it is.....

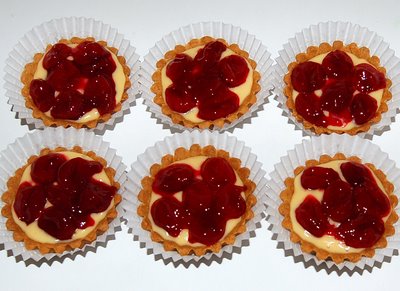
Cherry Tartlets

What do we need:

Short Crust Pastry
1 cup flour
1/4 cup butter
1 egg yolk
A pinch of salt

Filling
1 cup milk
1/4 cup sugar
1 egg yolk
1 tbsp custard powder
1 tbsp butter
1 tsp vanilla extract

Topping
1 can cherry compote
1 tsp corn flour
1 tbsp water

1 tbsp cherry preserve

How do we do it:

Grate cold butter into the flour. Add salt. Rub lightly with fingertips until the mixture resembles coarse breadcrumbs. Add the egg yolk. Knead very lightly to form smooth pastry. Wrap with a cling film and chill the pastry in the refrigerator for 30 minutes.

Divide the pastry dough into 8 portions. Press each portion evenly into greased tart mould. Trim edges to remove excess pastry. Prick base of each tart with a fork. Cover and chill again for about 15 minutes. Then, blind bake the pasty cases in a preheated oven at 200º C for 15 minutes. Remove from oven and place the tartlets on a wire rack to cool.

Combine all the filling ingredients together in a heavy bottomed pan. Whick contantly until the mixture thickens. Let the filling to cool completely.

Simmer the cherries together with the syrup. When the syrup reduces to half, stir in the corn flour mixed with water. Stir briskly until the mixture thickens. Set aside to cool completely.

To assemble, lightly spread the cherry preserve in the pastry shells. then, fill with a tablespoon of the filling. Finally, top with the cherries.


Sunday, 7 May 2006

Weekend Baking Session # 11

Pâte à choux or choux pastry is perhaps the simplest and uses an entirely different method of all pastries. Whereas other dough can be formed into various shapes, choux pastry is so soft that it hardly supports itself before baking.

Choux means cabbage in French as it derives its shape when the dough is piped or spooned and baked into cream puffs. The airiness is caused by the high water content, which is turned into steam during baking and these forces the pastry shell outwards and gives it volume.

Choux pastry could be used to make many sweet and savoury delicacies. This edition of Weekend Baking Session will be showcasing cream puff as I have been craving for it for a long time.

A perfectly made puff would have the finest crispy crust, the lightest interior, and an even and golden browned shape. Things to remember with choux pastry is that it does not keep well. Best eaten as soon as possible. It stays crisp for only about 4 hours. Another thing is that never fill too advanced as it would go soggy.

Cream Puffs

What do we need:

Choux pastry:


1 cup bread flour
1/2 cup butter
1/2 cup milk
1/2 cup water
4 eggs
1 tsp sugar
1/4 tsp salt

Pastry Cream:


1 cup milk
1/4 cup sugar
2 tbsp cornstarch
2 tbsp butter
2 tbsp cornstarch
2 tsp vanilla

How do we do it:

Put the water, milk, butter, salt and sugar in a saucepan over a high heat and bring to the boil. When the liquid boils rapidly, remove the saucepan from the heat and quickly and evenly tip in the flour all at once, stirring vigorously until it is smooth and well amalgamated. The mixture will come away from sides of pan and form a ball in centre.

Return the pan back on a low heat and stir for 1 minute. This is to dry out the mixture slightly. Avoid drying out the pastry too much as it will crack when baking. Break 1 egg at a time into the pastry while beating vigorously until smooth and fluffy.

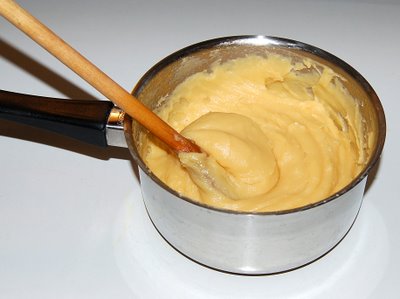
When done, the choux pastry should be a pale yellow, smooth, moist, sticky, and slightly elastic.


Drop by tablespoonful onto a lined baking sheet 3 inches apart in staggered rows. This is to ensure that the buns cook evenly. Bake in a preheated oven at 200°C for 20-25 minutes or until the buns are puffed and golden colour. Pierce the side or end of each bun to let out the steam. Transfer to a wire rack and leave to cool completely.


Meanwhile, prepare the pastry cream. Mix milk, sugar, salt and the egg yolks together. Whisk until well mixed. Cook on a medium low heat, stirring constantly until mixtures thickens and boils. Remove from heat and stir in butter and vanilla. Cool completely.

To assemble, cut off tops of the buns and fill with the pastry cream. Other fillings such as cream cheese, whipping cream or ice-cream could be used as well.

Sunday, 23 April 2006

Weekend Baking Session # 9

Here comes weekend again. After 5 sessions of continuos cake baking, for this edition of Weekend Baking Session, I have thought of baking a pie.

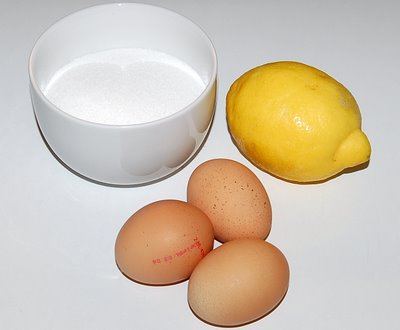
I had a few lemons. Looking at them, a luscious lemon meringue pie came to my mind. I had wanted to try it out for nearly a year. Lemon meringue pie is a dessert made with a pastry base, lemon curd filling and a fluffy meringue topping.

Lemon Meringue Pie

What do we need:

Pie Crust:
2 cups flour
1/2 cup cold butter
1/4 cup ice cold water
1/2 tsp salt

Lemon Curd Filling:


3 egg yolks
3/4 cup sugar
1/4 cup plain flour
1/4 cup cornstarch
1 1/2 cups water
1/3 cup lemon juice
1 lemon, zested
2 tbsp butter
1/4 tsp salt

Meringue Topping:
3 egg whites
1/4 cup sugar
1/4 tsp cream of tartar
1/2 tsp vanilla extract

How do we do it:

In a food processor, place the flour, salt and cold butter. At a slow speed mix the ingredients until it resembles coarse breadcrumbs. Gradually, add the ice cold water 1 tablespoon at a time just until the dough binds together. Make sure not to over work the dough. Wrap with cling film and refrigerate for 2 hours.

On a floured board, roll out the dough into a disk, 2 or 3 inches larger than the pan. Transfer the pastry onto the pan. Fit the pastry very well on the bottom and side of the pan. Cut excess pastry 1 cm to the outside. Pinch the pastry edges to beautify it. Line with a sheet of aluminium foil and place dried beans or rice as weights. The purpose is to prevent the pastry from bulging out when baking. This method of baking is called blind baking. Bake in a preheated oven at 230°C for 10-15 minutes. Remove from oven. Then, lift the aluminium foil together with the weight. Now return the pastry shell to the oven and bake for another 5 more minutes. Remove from oven and set aside.

In a heavy saucepan, combine the sugar, both the flours, salt and water. Stir constantly over medium heat until mixture boils. Stir vigorously, for 1 minute. Remove from heat. Slightly beat the egg yolks. Mix half the boiled mixture with the egg yolks. Then put the egg yolk mixture back into the pan with the boiled ingredients. This method is called tempering of the egg yolks. Cook for 1 more minute, stirring constantly and, again, vigorously. Remove from heat and add the butter. Stir unitl the butter melts. Add the lemon zest and juice and butter. Stir well to mix thoroughly. Set aside.

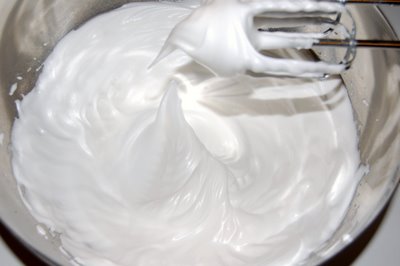
In a clean, grease free bowl, beat the egg whites and cream of tartar with an electric mixer on high speed until foamy. Beat in sugar, 1 tablespoon at a time. Continue beating until stiff peaks form. Beat in vanilla.


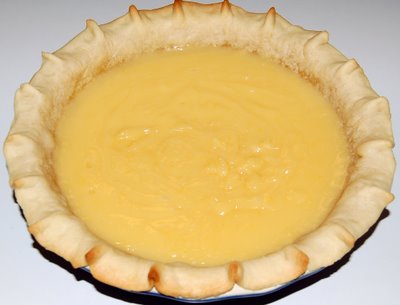
To assemble, pour the lemon curd into the pastry shell and spread it out evenly.


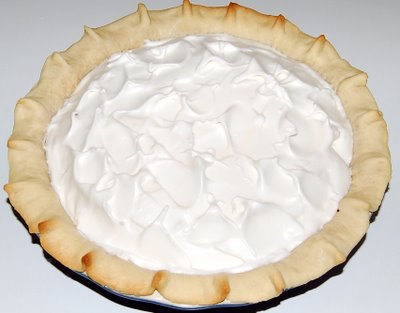
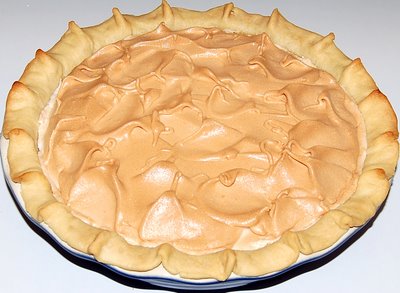
Spoon the meringue over the top of the lemon curd filling. Seal the meringue to the pastry edge. Make sure there are no gaps. Spread out evenly and swirl it into peaks.


Bake in a preheated oven at 150° C for 30 or until meringue turns lightly brown. Remove and let cool on a rack before chilling it.


When serving, cut the pie with a wet knife as meringue pies cut better with a wet knife blade.

Sunday, 12 March 2006

Weekend Baking Session # 3

This week of Weekend Baking Session, I intend to bake tarts. Been a while since I baked them. I love tarts though they are sinfull due to the amount of fat used in the pastry. I prefer baking little tartlets compared to a big ones. I think they look better and neater. I have tried out fruits, egg, coconut, cherry and lemon tarts before. This time I am going to go for orange tarts.

Orange Tartlets

What do we need:

Sweet Short Crust Pastry:


1 1/2 cups plain flour
1/2 cup butter, cold
1/4 cup sugar
1/2 an egg
1 tsp lemon juice
cold water, as necessary

Orange Filling:


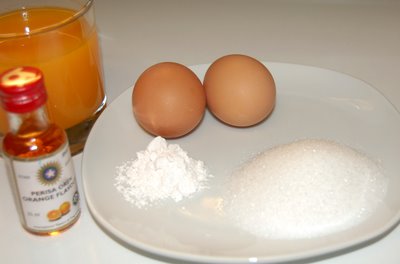
3/4 cup orange juice
1 tbsp lemon juice
2 1/2 eggs
1/4 cup sugar, or as desired
1/2 tbsp custard powder
1 tbsp orange zest or 1 tsp orange essence

What do we do:

Sift flour and add the sugar. Grate cold butter into the flour mixture and rub lightly with fingertips until the mixture resembles coarse breadcrumbs. Add lightly beaten half an egg and lemon juice. Stir in the cold water, if necessary. Knead very lightly to form smooth pastry. Wrap with a cling film and chill the pastry in the refrigerator for 30 minutes.

Divide the pastry dough into 10 portions. Press each portion evenly into greased tart mould. Trim edges to remove excess pastry. Prick base of each tart with a fork. Cover and chill again for about 15 minutes. Then, blind bake the pasty cases in a preheated oven at 200º C for 15 minutes. Remove from oven and place the tartlets on a wire rack to cool.


Meanwhile, mix all the filling ingredients together and beat until the sugar has dissolved. Sieve the mixture to ensure that it is free of lumps. Pour the filling into each pastry case. Bake in a preheated oven at 180º C for 20 -25 minutes or until filling is set. Transfer the tartlets to wire rack to cool. Then, cover and refigerate until well chilled, about 1 hour.


Serve the orange tartlet with a dollop of whipped cream.
Related Posts Plugin for WordPress, Blogger...